
Unpacking after a move can feel like a victory lap—until you notice a cracked mirror, a gouged table leg, or a box that looks like it took a tumble. If you’ve found damage after a move, you’re not alone, and you’re not stuck. There’s a clear, practical way to document what happened, protect your rights, and move the process forward without turning it into a months-long headache.
The key is to act quickly and methodically. Damage claims (whether through a mover’s valuation coverage, third-party insurance, or a credit card benefit) tend to go smoother when you have strong documentation and a calm, organized timeline. This guide walks you through exactly what to do—step by step—so you can focus on getting your home back in order.
Start with a quick, calm damage triage
Before you fire off emails or start tossing packing paper, take a breath and do a fast triage. Your first goal is to understand the scope: is the damage cosmetic, functional, or potentially hazardous? A chipped dish is frustrating; a cracked TV screen or a dented appliance that may have electrical issues is a different category.
Walk through your home and note damage in three buckets: (1) high-value items (electronics, antiques, art), (2) functional essentials (bed frame, couch, appliances), and (3) low-cost replaceables (basic kitchenware). This helps you prioritize what to document first and what may need immediate attention.
If something looks unsafe—like a damaged propane appliance, a cracked aquarium, or a splintered piece of furniture that could collapse—stop using it. Set it aside in a safe spot and document it as-is. Safety comes first, and it also prevents the claim from being complicated by further damage.
Don’t throw anything away (including packing materials)
It’s tempting to clean up quickly, especially when your new place is already a maze of boxes. But for damage claims, the packaging is evidence. Torn cartons, crushed corners, missing padding, and even the way an item was wrapped can help show what happened.
Keep the damaged item, the box it came in, and all packing materials together in one place. If the mover used wardrobe boxes, dish packs, or specialized crates, keep those too. If you can, label the pile with a sticky note like “Box 14 – kitchen – damaged” so you can reference it later without guesswork.
Also keep any small parts that may have broken off (screws, knobs, glass shards). Put them in a zip bag and photograph them next to the item. It might feel excessive, but it can be the difference between a quick approval and a slow back-and-forth.
Photograph and video the damage like you’re building a case file
Good documentation is clear, consistent, and time-stamped. Use your phone, but be intentional: take wide shots, medium shots, and close-ups. Wide shots show the whole item and its context; close-ups show the specific damage.
For each damaged item, capture:
- A wide photo showing the entire item
- Several close-ups of the damage from different angles
- A photo of the item’s brand/serial number label (if applicable)
- A photo of the box (all sides), especially crushed or punctured areas
- A photo of the moving sticker or inventory tag on the box/item
Video can help when damage is functional (drawers that won’t open, a TV that won’t power on, a recliner that’s stuck). Record a short clip showing the issue. Narrate what you’re doing and what you expected to happen. Keep it simple and factual.
Match each damaged item to your move paperwork
Most moves generate a paper trail: an estimate, an order for service, an inventory sheet, a bill of lading, and sometimes a condition report for high-value items. Your job is to connect the damaged item to the paperwork so it’s easy for the mover or insurer to verify it was transported.
Start by locating the inventory number or sticker on the item or box. If you can’t find one, check the inventory sheet and look for the description that matches (for example, “1 mirror, framed,” “1 coffee table,” “2 cartons—kitchen”). Write down the line item number and any notes that were recorded at pickup or delivery.
If you marked anything at delivery—like “scratched” or “carton crushed”—that’s helpful. If you didn’t, don’t panic. Many people are rushed at delivery. You can still file a claim, but your documentation needs to be extra clean and prompt.
Write a simple damage log (it’s more powerful than you think)
A damage log is just a running list that keeps details from getting lost in your camera roll. Create a document or spreadsheet with columns like: Item, Box/Inventory #, Room, Type of damage, Discovered date, Photos/Video file names, Estimated value, and Notes.
Keep it factual. Avoid emotional language like “destroyed” unless it truly is. Instead, use clear descriptions: “2-inch crack across center of screen,” “leg snapped at joint,” “deep scratch through veneer.” This makes your claim easier to evaluate and harder to dismiss.
As you unpack more boxes, add to the same log. It’s common to find damage days later, especially with rarely used items. A single organized list prevents the “wait, which box was that?” problem.
Check your coverage: valuation, insurance, and what you actually agreed to
This part is where many people get surprised. Movers typically offer “valuation coverage,” which is not the same as full insurance. The level of coverage depends on what you selected in your paperwork and what was available for your move type.
Look for terms like “released value” (often a minimal per-pound amount) versus “full value protection” (where the mover may repair, replace, or pay for the item, sometimes with a deductible). If you purchased third-party moving insurance, find that policy and read the claim instructions—deadlines and documentation requirements can differ.
If your move involved storage-in-transit, a long-distance leg, or multiple crews, coverage can vary by segment. Your paperwork should indicate who had custody at each stage. If something went into a warehouse and came out damaged, that timeline matters.
Notify the mover fast—and do it in writing
Even if you’re still gathering details, let the mover know as soon as you identify damage. A quick email is fine. The goal is to create a time-stamped record that you reported issues promptly. Keep the message short: mention the move date, your name, the order or bill of lading number, and that you discovered damage while unpacking.
Ask what their formal claims process is and where to submit documentation. Some movers use an online portal; others use email forms. Either way, you want a clear checklist of what they require so you don’t have to redo work later.
If you’re working with a reputable operator—whether it’s a local crew or a long-distance carrier—this step usually sets a cooperative tone. Many issues get resolved faster when communication is calm and consistent.
Be specific about what you want: repair, replacement, or reimbursement
When you file a claim, you’ll usually be asked what outcome you’re seeking. Think about what actually makes sense for each item. A scratched dining chair might be repairable; a shattered glass tabletop likely isn’t. Electronics might be replaceable, but you may want data recovery or accessory replacement included.
For furniture, consider whether a professional repair would restore structural integrity and appearance. If the item is antique or sentimental, you may prefer repair even if replacement would be cheaper. For mass-produced items, replacement is often simpler.
Write your preference next to each item in your damage log. This helps you stay consistent and prevents the claim from turning into a vague “please fix this” request that drags on.
Gather proof of value without turning it into a research project
Claims often hinge on value. If you have receipts, great—save them as PDFs or screenshots. If you don’t, you can still support your claim with reasonable evidence: credit card statements, order confirmation emails, product listings showing current price, or comparable items from reputable retailers.
For older items, depreciation may apply depending on coverage. Still, it’s worth showing what a comparable item costs today. If you can find the same model number, even better. Include a screenshot of the listing with the date visible if possible.
For custom or handmade pieces, get a written estimate from a local repair shop or craftsperson. A short email quote that describes the repair and cost can be enough. Keep everything organized in a folder that matches your damage log entries.
Understand the difference between damage, loss, and “missing parts”
Not everything shows up as a broken object. Sometimes the “damage” is a missing hardware bag, a lost shelf, or a TV stand without its screws. Treat missing parts as a claim item too—especially if the mover disassembled furniture or appliances.
Document what’s missing with photos of the item and the place where the part should be. If the mover provided a parts box, photograph that box and its contents. If you find a random bag of screws that doesn’t match anything, photograph it as well and keep it.
For missing cartons, check the inventory sheet and compare it to what arrived. If a carton number is unaccounted for, report it immediately in writing. Missing boxes often require faster escalation than damaged items because they may still be traceable.
When the damage is to your home (walls, floors, door frames)
Item damage gets most of the attention, but property damage matters too. Scraped hardwood, dented drywall, chipped tile, and broken banisters can be expensive. The documentation approach is similar: photos, measurements, and a clear timeline.
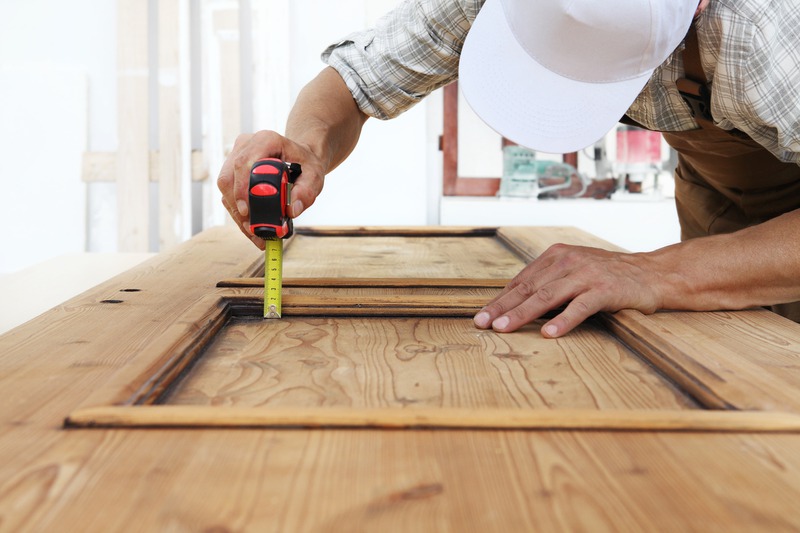
Take wide shots that show the location (for example, the hallway leading to the bedroom) and then close-ups showing the damage. Add a common object for scale, like a coin or tape measure. If you have “before” photos from real estate listings or your own camera roll, save those too.
Get one or two repair estimates from local contractors. Many will provide a quick written quote if you email photos. If the mover offers to send someone to inspect, that can be helpful—but still get your own estimate so you have a baseline.
How timelines and deadlines can trip people up
One of the biggest reasons claims go sideways is missed deadlines. Your paperwork may specify a window for reporting damage and a separate window for filing a formal claim. These are not always the same thing.
Put key dates on your calendar: delivery date, date you discovered the damage, date you notified the mover, and the claim submission deadline. If you’re still unpacking, set a “final sweep” date to check the remaining boxes so you don’t discover something after the window closes.
If you’re unsure about your deadline, ask the mover to confirm it in writing. It’s a simple request and can prevent misunderstandings later.
What to say (and not say) when you contact the moving company
Clear communication helps. In your first message, avoid accusations and stick to observable facts: what item, what damage, when discovered, and that you’re requesting the next steps for filing a claim.
It’s also smart to avoid fixing or repairing items before the mover or insurer has a chance to review them—unless it’s necessary for safety. If you must do an emergency repair (like securing a broken bed frame so someone can sleep), document the condition first and keep receipts for any materials or labor.
Keep a single email thread if possible. If you have to call, follow up with an email summary: date/time, who you spoke with, and what they said would happen next. That paper trail is your friend.
Why the quality of your mover matters (and what to do if you’re still choosing one)
If you’re reading this after a tough move, you already know that not all movers operate the same way. Some have tight processes, trained crews, and straightforward claims handling. Others are disorganized, which can make documentation even more important.
If you’re planning an upcoming move and want to reduce the odds of dealing with damage claims in the first place, it helps to work with a mover that has clear communication and a reputation for careful handling. For example, if you’re comparing options in Montana, you can look at a billings moving company that outlines services and sets expectations up front—those basics often correlate with smoother delivery and better issue resolution.
Similarly, if you’re relocating within the region and want to understand what a local operator offers, checking the service details for a moving company in billings, mt can give you a sense of how they handle packing, furniture protection, and logistics. Even when damage is rare, a mover’s process for prevention and follow-up makes a big difference.
How to handle partial unpacking and “we found it later” damage
Real life doesn’t allow everyone to unpack in 24 hours. If you discover damage days later, you can still take effective steps. The key is to document immediately upon discovery and show that the item remained packed or unused until then.
Photograph the box before you open it (especially if it looks crushed). Then photograph the packing layers as you remove them. This creates a mini “unboxing trail” that shows the condition wasn’t caused after delivery.
In your message to the mover, be transparent: “We discovered this while unpacking Box #___ on [date].” That’s normal and believable. What you want to avoid is waiting weeks and then reporting a long list with no photos of packaging—because that’s when disputes become more likely.
If the mover offers a repair vendor, ask the right questions
Many movers work with third-party repair techs for furniture refinishing, upholstery, or appliance inspection. That can be convenient, but you should still protect your interests.
Ask what the repair will involve, whether it restores function and appearance, and whether there is any warranty on the work. If it’s a high-end piece, ask about the technician’s experience with that material (leather, veneer, antique joints, specialty finishes).
Also ask whether you can approve the repair plan before work begins. If a repair would leave visible marks or reduce value, you may prefer reimbursement or replacement depending on your coverage.
When you should get a second opinion (even if a repair is approved)
Some damage is straightforward, but other cases are borderline—especially with structural furniture damage or water exposure. If a dresser took a hard hit and the frame is racked, a quick cosmetic patch might not hold up.
Getting a second opinion from a local furniture repair professional can help you understand whether the proposed fix is reasonable. It also gives you a written estimate you can use if the repair fails or if the mover’s offer doesn’t match the true scope.
This isn’t about being difficult; it’s about making sure the remedy actually solves the problem. A “fixed” item that still wobbles or sticks is going to keep bothering you long after the claim is closed.
Escalation paths if communication stalls
Sometimes claims stall because emails go unanswered or you keep getting bounced between departments. If that happens, move from casual follow-ups to structured escalation.
Send a concise email that includes: your claim number (if you have one), your original submission date, a bullet list of the items, and a clear request for a response by a specific date (for example, “within 5 business days”). Attach your damage log and a small set of key photos again so everything is in one place.
If the mover has a customer service manager or claims supervisor, ask to be routed to them. If you used a broker, notify the broker too. Keep the tone professional and factual—escalation works best when it’s organized, not heated.
Handling specialty items: TVs, computers, art, instruments, and antiques
Specialty items often require extra documentation because the cost of repair/replacement is higher and the cause of damage can be disputed. For TVs and monitors, photograph the screen powered on (if it turns on) to show the nature of the damage. For computers, note whether the device boots, whether the casing is bent, and whether data access is affected.
For framed art and mirrors, photograph the front, back, and frame corners. If glass broke, document the shards pattern and the packing method. For musical instruments, take photos of the case, latches, and any internal padding. If the instrument is out of tune or has a new buzz, record a short video demonstrating the sound issue.
For antiques, document distinguishing features and any pre-move condition photos you have. If you can get a note from an appraiser or specialty repair shop describing the damage and impact on value, that can strengthen your claim significantly.
What if you suspect water damage or mold risk?
Water damage is tricky because it can worsen over time. If you notice damp boxes, musty smells, or warped wood, document immediately. Photograph any visible moisture staining on cartons and contents.
Separate affected items from the rest of your belongings to reduce cross-contamination. Increase ventilation, and if safe, remove items from wet boxes so they can dry. Keep the damaged cartons for evidence, even if they’re soggy—just store them in a contained area like a garage with a tarp underneath.
If mold is a concern, consider bringing in a professional for an assessment, especially if the items are upholstered or if the water source is unknown. Health and safety should guide your next steps, even if it complicates the claim timeline.
How to keep the process from taking over your life
Damage claims can become mentally exhausting because they sit on your to-do list while you’re trying to settle in. A simple system helps: set aside two short blocks of time—one to document/unpack and one to handle emails and forms.
Create a single folder on your phone or computer labeled “Move Claim,” with subfolders for each item or room. Rename photos with a consistent pattern like “Box14_ToasterOven_Dent_1.jpg.” It sounds nerdy, but it saves time when you’re uploading multiple files.
Also, decide what “good enough” looks like. Not every scuff is worth a claim if it will cost you hours of effort for a small payout. Focus your energy on meaningful damage: high value, functional impact, or property damage that needs professional repair.
If you’re moving again soon, build a damage-prevention plan now
Once you’ve been through a damage situation, you can use what you learned to prevent the next one. Start by labeling boxes by both room and fragility level (for example, “Kitchen – Fragile – Glass”). Use a consistent numbering system so inventory lists and photos match.
For valuable items, take “before” photos right before packing. Photograph serial numbers and current condition. If you’re using a mover for packing, ask what materials they use for dishes, TVs, and artwork—and whether they crate specialty pieces.
If you’re relocating to a different region entirely, it can help to review movers’ service pages in advance so you know what’s included. For example, if you’re headed to Maine and comparing providers, looking at a moving company in bangor, me can give you a sense of what services are available locally, like packing help, storage, and specialty item handling.
A practical checklist you can follow today
If you want the whole game plan in one place, here’s a straightforward checklist you can work through without overthinking it.
Within the first 24–48 hours after discovering damage:
- Separate damaged items and keep all packaging
- Photograph the item, damage, box, and inventory tags
- Start a damage log with item details and discovery date
- Email the mover to notify them and request claim instructions
Over the next few days:
- Match each item to your inventory sheet/bill of lading
- Collect receipts, screenshots, or comparable pricing
- Get repair estimates for furniture or home damage
- Submit the formal claim with organized attachments
If things slow down:
- Follow up in writing with your claim number and a response deadline
- Keep communication in one thread and save all messages
- Escalate to a supervisor or broker if needed
What “resolution” can look like (and how to evaluate an offer)
When the mover responds, you may receive an offer to repair, an offer to reimburse, or a request for more information. Review it carefully and compare it against your documentation and coverage terms.
If the offer is a reimbursement amount, check whether depreciation or a deductible is being applied. If it’s a repair, confirm the timeline and whether you can inspect the work before signing off. If it’s replacement, confirm whether they’re replacing with like kind and quality (not a cheaper alternative).
If something doesn’t add up, ask for clarification in writing. It’s completely fair to request a breakdown of how they calculated the amount, especially for high-value items or repairs that affect your home.
Settling in while the claim is still open
It’s frustrating to live around damaged items while you wait for a claim decision. If you can, set up your home so the damaged pieces are out of the way but still accessible for inspection. That might mean keeping a cracked mirror in a spare room or leaving a scratched table covered and unused for now.
Try to avoid making permanent changes that could be interpreted as altering evidence—like refinishing a surface or throwing away broken parts. If you need to buy a temporary replacement (say, a cheap microwave because yours was damaged), keep the receipt; depending on coverage, it may or may not be reimbursable, but it’s worth having.
Most importantly, keep your documentation organized until the matter is fully resolved. Even after a settlement, save your claim file for a while in case questions come up later.
Damage after a move is stressful, but it doesn’t have to be chaotic. With a clear log, solid photos, and prompt written communication, you give yourself the best chance at a fair outcome—and you’ll feel a lot more in control while you’re getting settled into your new space.



















































































0