
If you’ve ever tried to answer the question, “How long will a whole-home remodel take?” you’ve probably heard everything from “a few months” to “a year or more.” The truth is: both can be right. A whole-home remodel timeline depends on your home’s condition, how much you’re changing, how fast decisions get made, and how smoothly the permitting and construction process goes.
Instead of giving you a single number that won’t fit your situation, this guide breaks down a realistic whole-home remodel timeline phase by phase. You’ll see what typically happens in each stage, what can speed things up (or slow them down), and how to plan your life around the work—especially if you’re living in the home while it’s being remodeled.
Throughout, keep in mind that “whole-home remodel” can mean very different scopes: cosmetic refreshes (paint, flooring, fixtures), mid-level renovations (new kitchen + baths + some walls moved), or major transformations (structural changes, additions, full system replacements). The more your project leans toward “major,” the more your timeline will lean toward the longer end.
First, what “whole-home remodel” usually includes (and why that matters for time)
When people say “whole-home remodel,” they often mean multiple projects bundled into one: a kitchen update, bathroom upgrades, new flooring, lighting, paint, maybe new windows, and sometimes changes to the layout. Each of those has its own mini-timeline, and the tricky part is sequencing them so trades aren’t tripping over each other.
Time isn’t just about how many tasks you have—it’s about dependencies. You can’t install cabinets before the walls are finished. You can’t close up drywall until inspections are passed. You can’t order custom windows at the last minute and expect them next week. A realistic timeline is basically a map of those dependencies, plus a buffer for the stuff that always pops up once walls open.
It also matters whether you’re renovating a newer home or an older one. Older homes can hide surprises: outdated wiring, plumbing that needs replacement, framing that isn’t standard, or previous DIY work that has to be corrected. Those discoveries don’t just add tasks; they can pause work until a plan is updated and materials are sourced.
The timeline at a glance: typical ranges for a whole-home remodel
Every home is unique, but these ranges help set expectations. For a moderate-to-major whole-home remodel (kitchen, multiple baths, flooring, paint, lighting, possible layout tweaks), a common range is 6 to 12 months from initial planning to final punch list.
If you’re doing a lighter remodel with minimal layout changes and your materials are readily available, you may finish in 3 to 6 months. If you’re doing major structural work, additions, or full mechanical replacement (HVAC, plumbing, electrical), you can be looking at 12 to 18 months, especially if design decisions evolve along the way.
A smart way to think about it: the “construction” portion is only one slice. Design, engineering, selections, ordering, and permitting can take as long as the build itself—sometimes longer—depending on how quickly choices are made and how busy your local permitting office is.
Phase 1: Vision, priorities, and budget reality check (1–4 weeks)
This phase looks simple, but it’s where timelines are either set up for success or quietly sabotaged. The goal is to align on what you’re remodeling, why you’re remodeling it, and what you’re willing to spend to get there. If you skip clarity here, you’ll pay for it later in change orders and delays.
Start by listing your “must-haves” versus “nice-to-haves.” A must-have might be “replace failing plumbing” or “create an open kitchen-living area.” A nice-to-have might be “add a beverage fridge” or “upgrade to designer tile in the guest bath.” This list helps you make fast decisions when budget or timing pressure shows up.
Also, decide early how you’ll live during the remodel. If you’re staying in the home, your timeline may stretch because work has to be phased (for example, keeping one bathroom functional). If you’re moving out, crews can typically work faster with fewer daily constraints.
Phase 2: Finding the right team and defining scope (2–6 weeks)
Once you have a rough vision, it’s time to choose your remodel partner and lock down the scope. This is where you’ll compare proposals, talk through approaches, and figure out who communicates clearly and proactively. The speed of your project later often depends on how organized your team is at the beginning.
If you’re remodeling in Arizona and want a team that can coordinate design, planning, and construction, working with a specialized remodeling company scottsdale homeowners trust can make the whole process feel less like juggling and more like following a roadmap. The right partner will help you avoid common scheduling pitfalls like ordering materials too late or starting demolition before key decisions are finalized.
During this phase, you’ll also get a more detailed understanding of what your remodel includes: structural changes, plumbing moves, electrical upgrades, new windows/doors, flooring, cabinetry, appliances, and finishes. A clear scope is what lets a contractor build a schedule that’s more than just a guess.
Phase 3: Design, drawings, and engineering (4–12 weeks)
This is where your ideas become buildable plans. Depending on your remodel complexity, you may need floor plans, elevations, reflected ceiling plans (lighting layout), and detailed kitchen/bath drawings. If walls are moving or structural elements are changing, you’ll likely need engineering too.
Design can go quickly when homeowners are decisive and the layout is mostly staying put. It can also take longer if you’re exploring multiple layout options or if you’re trying to solve tricky issues like low ceiling heights, awkward room shapes, or poor natural light. The time you spend refining a plan now is often time saved during construction because fewer surprises show up later.
One thing that helps: set deadlines for decisions. For example, “We’ll finalize layout by next Friday,” or “We’ll approve the kitchen cabinet design by the end of the month.” Design is creative, but it still benefits from structure—especially when you’re aiming for a predictable timeline.
Phase 4: Permits and approvals (2–10+ weeks)
Permitting timelines vary widely by location and by the type of work you’re doing. Cosmetic changes may not require permits, but moving plumbing, altering electrical, changing structural walls, or modifying exterior openings often will. If you’re doing an addition, expect more review time.
Even when a permit is “straightforward,” review cycles can add time. Plans may come back with comments that require revisions. In some cases, you’ll need separate permits for different parts of the work. Your contractor can often help anticipate what reviewers will ask for, but it’s still a phase where patience is useful.
It’s also important to avoid scheduling major milestones (like move-out dates or large deliveries) based on optimistic permit timing. A realistic schedule includes buffer time here, because permitting is one of the least controllable parts of the process.
Phase 5: Selections and ordering materials (4–16 weeks, often overlapping)
This phase is where many remodel timelines quietly break. It’s not the demo that delays projects most often—it’s waiting on materials that weren’t selected early enough. Cabinets, windows, custom doors, specialty tile, and certain appliances can have long lead times.
To keep things moving, focus first on long-lead items. Cabinets are a big one, because they affect kitchen and bathroom schedules, countertop templating, and even electrical placement (outlets, lighting, appliance circuits). Windows and exterior doors can also be critical if you’re changing openings or improving energy efficiency.
A helpful approach is to create a “decision calendar” with your contractor or designer. It lists what must be chosen and by when to avoid slowing down the build. Think of it as a checklist that protects your timeline.
Phase 6: Pre-construction planning and site prep (1–3 weeks)
Before demolition starts, a good team will confirm the schedule, verify measurements, and plan protection for the parts of your home that aren’t being remodeled. This can include floor protection, plastic barriers for dust, and setting up a staging area for tools and materials.
If you’re living at home during the remodel, this is also where you’ll plan temporary routines: where you’ll store essentials, how you’ll handle pets, and which rooms will be off-limits. It’s not glamorous, but it makes day-to-day life much easier once the work begins.
Pre-construction is also a great time to walk through “what if” scenarios. What if a backordered item doesn’t arrive? What if we discover old plumbing needs replacement? Having a contingency plan doesn’t eliminate surprises, but it reduces the panic when something changes.
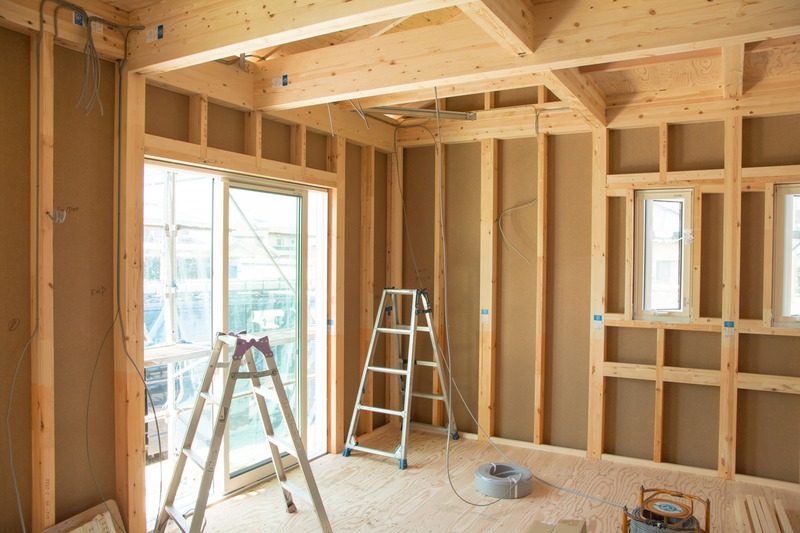
Phase 7: Demolition and rough framing (1–4+ weeks)
Demolition is fast, loud, and surprisingly emotional. It’s exciting to see progress, but it can also feel chaotic. In a whole-home remodel, demo may be phased to keep parts of the home usable, which can extend the schedule compared to a full gut where everything is cleared at once.
After demo, framing changes happen: new walls, widened doorways, adjusted openings, and any structural reinforcements. If you’re opening up a kitchen-living area or reworking the primary suite, this is where the home starts to look like the new plan.
This is also when hidden issues are most likely to appear—water damage, termite damage, out-of-date wiring, or plumbing that wasn’t visible before. Some discoveries are small and easy to handle; others require changes to the plan or additional inspections, which can add time.
Phase 8: Rough-ins for plumbing, electrical, and HVAC (2–6 weeks)
Rough-ins are the “behind the walls” work that makes the home function. Electricians run new wiring and circuits, plumbers set new supply and drain lines, and HVAC teams adjust ductwork or install new systems. This stage is critical for safety and performance, and it’s not the place to rush.
Expect multiple site visits and coordination between trades. For example, if you’re adding recessed lighting, the electrical plan needs to match the ceiling framing. If you’re relocating a shower, the plumbing needs to align with the new layout and slope requirements. If you’re upgrading appliances, you may need new dedicated circuits or gas line adjustments.
Inspections typically happen around this stage. Passing inspections on the first try helps keep momentum. That’s why clear plans, experienced trades, and good supervision are such big timeline protectors.
Phase 9: Insulation, drywall, and getting back to “rooms” (2–6 weeks)
Once rough-ins are approved, insulation goes in (if needed), then drywall gets hung, taped, mudded, and sanded. This is where your home starts to feel like a home again—walls go back up, and spaces become defined.
Drywall takes time because it’s a multi-step process with drying time between coats. Rushing this stage can lead to visible seams, cracks, or uneven walls that bother you for years. A realistic timeline respects the curing and drying process, especially in climates or seasons where humidity affects drying time.
After drywall, primer often goes on to seal surfaces and reveal any imperfections that need touch-ups. It’s a satisfying moment because you can finally see the remodel’s shape without exposed studs and wiring.
Phase 10: Paint, flooring, and the surfaces you touch every day (2–8 weeks)
This phase is where the remodel becomes visually real. Paint colors, flooring materials, trim profiles, and door styles all come together. It’s also a phase where sequencing matters a lot—some teams prefer to paint before flooring to avoid splatter, while others adjust based on the type of flooring and the scope of trim work.
Flooring timelines vary widely. Tile floors and showers require prep, waterproofing, setting, grouting, and curing. Hardwood or engineered wood may require acclimation time. Luxury vinyl plank installs quickly, but subfloor prep can add time if the existing surface isn’t level.
Trim and doors often happen alongside flooring and paint. This is where craftsmanship shows. Clean lines, smooth transitions, and well-fitted trim make even modest materials look high-end.
Phase 11: Kitchen build-out (4–10+ weeks)
Kitchens are often the pacing item in a whole-home remodel because they include so many moving parts: cabinetry, countertops, backsplash tile, appliances, plumbing fixtures, lighting, and sometimes structural changes. If your kitchen is custom or semi-custom, cabinet lead times and installation schedules are major timeline drivers.
Once cabinets are installed, countertops are templated. That templating-to-install window can be anywhere from a week to several weeks depending on the material and fabricator schedule. After countertops go in, sinks and plumbing hookups can be finalized, and backsplash tile can be installed.
If you’re aiming for a kitchen that’s both functional and built to last, it helps to work with experienced kitchen remodelers scottsdale homeowners rely on—especially if you’re changing layouts, upgrading electrical capacity, or integrating built-in appliances. A well-run kitchen phase is less about rushing and more about making sure each step sets up the next one cleanly.
Phase 12: Bathroom remodel phases (3–8+ weeks per bathroom, often overlapping)
Bathrooms can be deceptively time-intensive because they involve waterproofing, tile work, plumbing, ventilation, and detailed finish installation in a small space. Multiply that by two or three bathrooms, and it’s easy to see how the timeline grows.
A typical bathroom sequence includes demo, framing adjustments (if any), plumbing and electrical rough-ins, waterproofing (especially for showers), tile installation, vanity and countertop install, fixture hookups, mirrors, accessories, and final paint/touch-ups. Each step has dependencies and cure times—particularly waterproofing membranes, thinset, grout, and caulk.
If your project includes multiple bathrooms, it’s worth planning which one gets done first and how you’ll keep at least one functioning. Coordinating with skilled bathroom remodel contractors scottsdale homeowners trust can help keep the process efficient, especially when tile schedules, fixture lead times, and inspection requirements all intersect.
Phase 13: Fixtures, finishes, and “why is this taking so long?” details (2–6 weeks)
This is the stage where the home looks close to finished, but the calendar still has pages left. Light fixtures get installed, plumbing fixtures are set, hardware goes on cabinets, closet systems may be added, and final electrical devices (switches, outlets, plates) are installed.
It’s also when small problems become more noticeable: a door that rubs, a drawer that doesn’t glide smoothly, a paint line that needs sharpening, a tile edge that needs a cleaner transition. These aren’t usually big-ticket items, but they take time because they’re detailed and often require the right person (not just any available trade) to fix them.
Homeowners sometimes get frustrated here because the home looks “done,” yet crews keep coming back. The reality is that finishing work is what separates a remodel that merely looks new from one that feels polished and comfortable every day.
Phase 14: Final inspections, punch list, and handoff (1–4 weeks)
Depending on your scope and local requirements, there may be final inspections for building, electrical, plumbing, and mechanical. Passing these is essential for safety and for closing permits properly.
Then comes the punch list: a documented list of remaining items to correct, adjust, or complete. This might include paint touch-ups, caulking, minor drywall repairs, aligning cabinet doors, replacing a chipped tile, or adjusting HVAC registers. A thorough punch list is a good sign—it means details are being taken seriously.
Finally, you’ll get a handoff: warranty information, care instructions for materials (like natural stone counters or specialty flooring), and guidance on what to expect as the home settles. Even after a remodel is “finished,” small settling cracks or adjustments can happen, and it’s helpful to know what’s normal and what should be addressed.
What commonly stretches a whole-home remodel timeline (and how to reduce the risk)
Delays aren’t always avoidable, but many are predictable. The most common timeline stretchers are late material selections, long lead times, permit delays, hidden conditions (like water damage), and change orders that alter the scope midstream.
You can reduce risk by making decisions earlier than you think you need to, especially for cabinets, windows, doors, tile, and appliances. You can also keep a “backup option” for key items—if your first-choice tile is out of stock, having a second choice ready can save weeks.
Another big factor is communication. Weekly check-ins with your contractor (even a quick 15 minutes) help surface issues early. Small schedule shifts are normal; the goal is to prevent small shifts from turning into big ones.
Living in the house during the remodel: what it does to the schedule
Living at home during a whole-home remodel is possible, but it usually slows things down. Crews may need to stop earlier in the day, keep certain pathways open, or phase work so you have access to a bathroom, a sleeping area, and at least a basic kitchen setup.
Dust control and safety barriers take time to set up and maintain. Noise restrictions (especially in communities with HOA rules) can also limit working hours. And if you’re working from home, you may ask for quieter blocks of time, which can reduce productivity.
If you do stay, plan for “temporary living” inside your own home. Set up a mini kitchen with a microwave, toaster oven, and coffee maker. Store daily essentials in bins you can move easily. And if you can schedule a short getaway during the messiest phases (demo and drywall sanding), you’ll likely be happier.
How to build a timeline you can actually trust
A trustworthy remodel timeline is detailed, not vague. It should show major phases, dependencies, and decision deadlines. It should also include buffer time for inspections and for inevitable surprises. If a timeline promises perfection with no slack, it’s not realistic—it’s just optimistic.
Ask for clarity on what triggers each phase. For example: “Cabinet install begins after drywall is finished and cabinets are on site.” That kind of specificity helps you understand where delays might come from and what you can do to prevent them.
Also ask how the schedule will be updated. A good process includes regular schedule reviews, especially when lead times shift or when a hidden condition changes the plan. The goal isn’t to never change the schedule; it’s to keep you informed and keep the project moving with minimal disruption.
A sample whole-home remodel schedule (moderate scope, 6–10 months)
If it helps to see it laid out, here’s an example schedule for a moderate whole-home remodel where you’re updating a kitchen, two bathrooms, flooring, paint, lighting, and making a couple of layout adjustments:
Weeks 1–4: Vision, budgeting, contractor selection, initial design direction
Weeks 5–12: Design development, drawings, engineering (if needed), selections begin
Weeks 9–16: Permits submitted and processed (overlapping), long-lead items ordered
Weeks 17–18: Pre-construction planning, site protection, staging
Weeks 19–22: Demolition and framing changes
Weeks 23–28: Rough-ins + inspections
Weeks 29–34: Drywall, primer, early paint
Weeks 35–42: Flooring, trim, cabinetry, tile work
Weeks 43–46: Countertops, fixtures, final electrical/plumbing, finish paint
Weeks 47–50: Punch list, final inspections, handoff
That’s just a sample, but it shows the big idea: design and ordering overlap with permits, and construction is a chain of dependent steps. When one link changes, the rest of the chain shifts too.
Planning for the emotional timeline, not just the construction timeline
There’s also a human side to remodeling that doesn’t show up on a Gantt chart. Early on, excitement is high. During demo, adrenaline kicks in. Then there’s often a “mess fatigue” phase where it feels like everything is taking forever, even if progress is happening on schedule.
Knowing this pattern helps. It’s normal to feel impatient when you’re living with dust, noise, and constant decisions. One way to stay grounded is to track progress by milestones rather than by days. “Rough-ins passed inspection” is a meaningful win, even if the space still looks unfinished.
It also helps to keep a small contingency budget and a little schedule flexibility. When you’re not stretched to the absolute limit, you can make better decisions and enjoy the process more.
When to start your remodel if you have a deadline (holidays, events, or a move)
If you’re remodeling with a hard deadline—hosting family, a new baby, a move-in date—work backward with extra buffer. For a whole-home remodel, it’s wise to aim to “finish” at least 4–8 weeks before the real deadline. That gives you time for punch list items, cleaning, furniture setup, and the unexpected.
Also consider seasonal factors. Contractor schedules can be busier at certain times of year, and lead times can fluctuate. If you’re trying to wrap up before a major holiday, know that deliveries and trade availability can be tighter as that date approaches.
The earlier you start planning, the more control you have. Even if you’re not ready to swing a hammer, starting design and selections early is one of the best ways to protect your desired completion date.
A realistic whole-home remodel timeline isn’t about predicting the future perfectly—it’s about building a plan that accounts for how remodeling actually works. With clear scope, early selections, good communication, and a bit of buffer, you can move through each phase with fewer surprises and a lot more confidence.


0